Showing posts with label light. Show all posts

Friday

Part 4. Light. Shiny Surfaces.

I purposely bought A3 tracing paper in a pad through Amazon UK,  and shipped it over in my hand luggage along with 200 black straws that I thought I would need to make a diffuser for my flash, after watching a link on utube months ago. The straws were loose in my hand luggage as the box they arrived in was so large...hoping and praying when coming through security they would not want me to open my suitcase.  Thankfully easy jet were lenient the day we flew in to Bordeaux...they are now stored away for a rainy day or a BBQ and drinks party, having not used the straws.  The tracing paper was not really large enough, therefore a blue peter moment arrived...taping and cutting, fixing to my lens only to find it restricted me when trying to put finishing touches to focusing.  Near on impossible when focus ring surrounded in paper. 
However secure and long the cone was I still got light in from the light through the doors.....I ditched all of yesterdays attempts and tried again today, whilst there was little or no sun. A little more successful but still not entirely happy.  Yesterday I started out with an egg cup and small spoon, today I used just the egg cup in the end as I could not stop the reflections on the spoon from the egg cup.  I now understand just how very difficult it is to get a reflection free image when shooting shiny surfaces. 
I chose to use black velvet as the base, after raiding my wardrobe, I found the perfect fabric in an evening skirt.  I shopped for black card and white card but was unlucky, I will try again at the weekend. 
Below are my results.


Fig 1.
This image was from the first days attempts, I chose to select the WB. to daylight, with a 18 - 105 lens.
Manual mode was selected with ISO 650 and shutter speed of 0.7 sec.
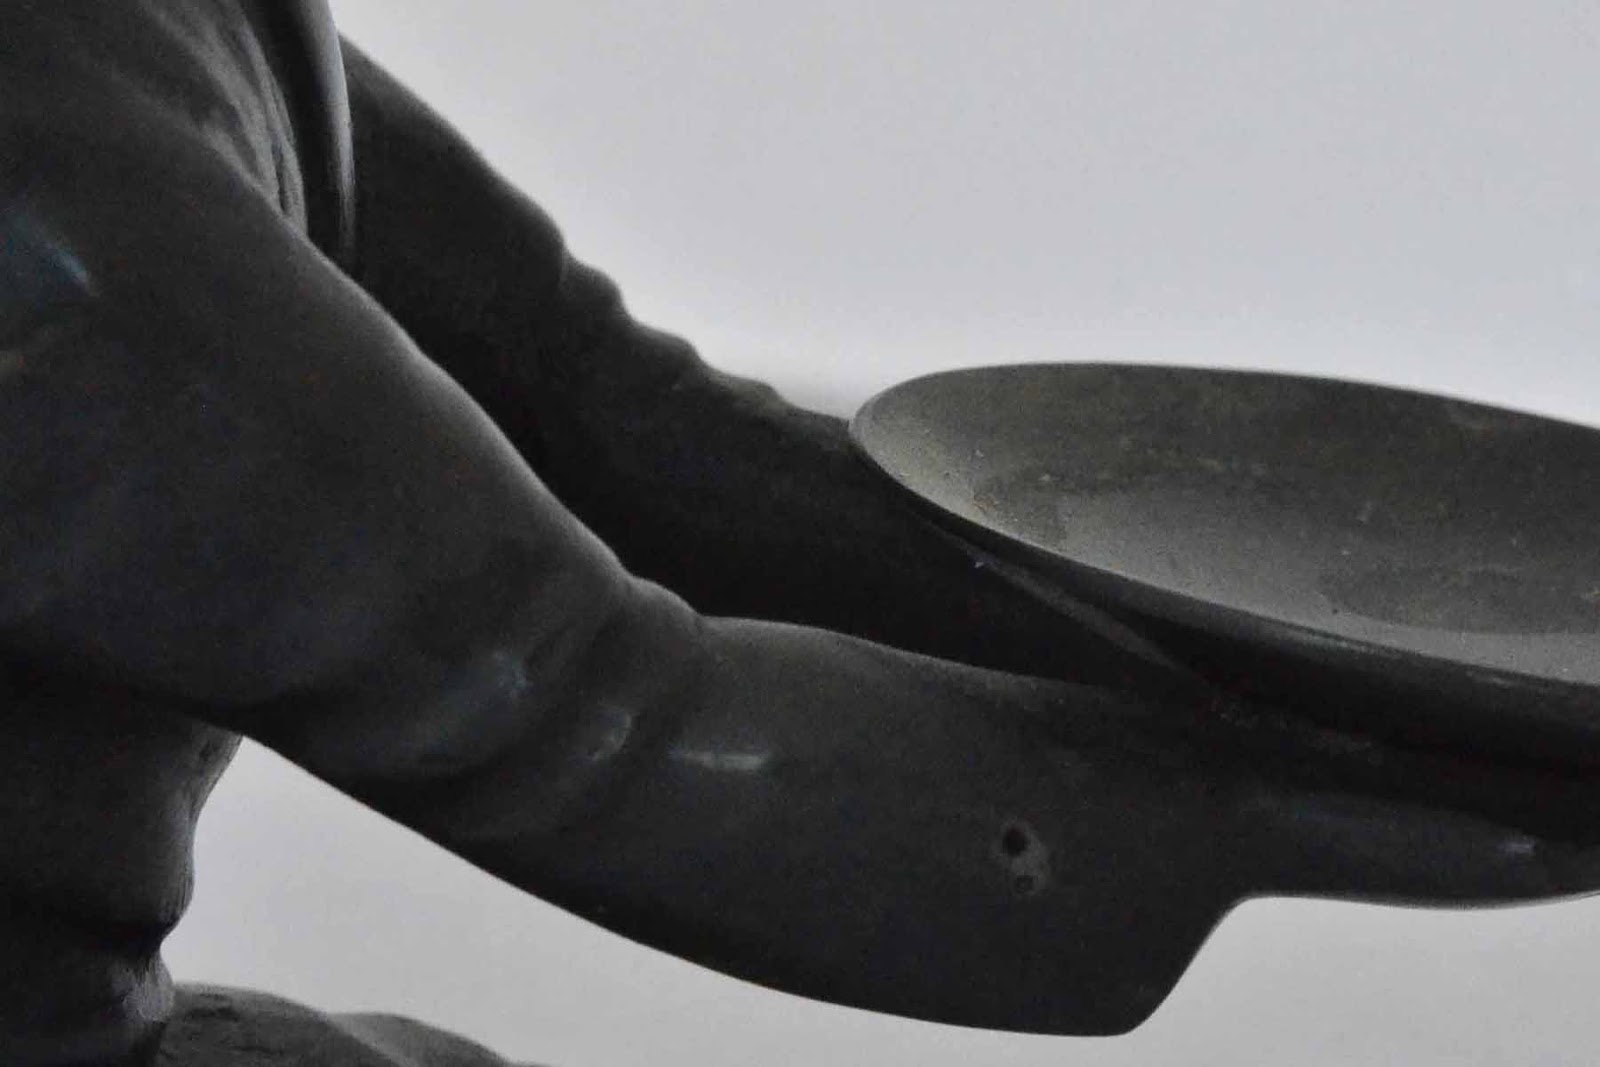
I am still able to see reflection in the spoon and on the egg cup, there is also the reflection on the bowl of the spoon from my lens., this shows itself as a small black spot.  The rings of the egg cup are reflected in the bowl too. 
The aperture was not small enough in this image to give a clear all image throughout, the edge of the end of the spoon is out of focus.
 
Fig 2
The same still life, and this time I used a speedlite flash, on my camera, to see what would happen if anything to the image. The light was softened and diffused by the paper cone, therefor there are very subtle if any changes.  The reflections remain the same as above.
 
 
Fig 3
Day 2 and a single item.  
60 mm lens
Hand selected white balance - Kelvin 4350
 I adjusted the aperture to F/16.0 and the shutter speed to 6 seconds.  I used an ISO of 125 and 60mm lens.  Thank goodness for shutter release cables.  I feel that this is a reasonably good effort after my struggles yesterday. With the cone attached to the lens I did struggle to fine tune my focusing.
 
 
Fig 4
Hand selected white balance - Kelvin 4350
60mm lens
Day 2 again, and this time I closed down the aperture to F/38.0. and a shutter speed of 30 secs.  The ISO remains the same. There is a faint dark line through the centre of both these images I guess that this is a reflection from the lens on each ring, unless one thinks to hang a translucent fabric between lens and subject... the lens will always be seen on the shiny surface when taken from above.  
 
 
I have realised from working on this exercise for two days, that my object that I chosen to use for Assignment 4 has one very shiny surface and I am going to have problems...with reflections from light. 
All the light I use when capturing this subject will have to be diffused to soften. Today before I put away the cone I placed my object on the black background minus the cone and the results show all the light and my reflection.. even though I lay the black base inside the light box.  I then proceeded to add the cone over lens and the results were vastly improved. 
May as yet use those straws and make a diffuser...... 


Thursday

Part 4 Light. Tungsten and fluorescent lighting.

I am publishing part One of this exercise and will work on the Fluorescent lighting in part two when I have spoken to a neighbour and got permission to shoot images in his barn.

CFL lamps are all around me in the house,  but not as main lighting in my lounge.  In France it is very nearly impossible to buy an ordinary light bulb, they are so into energy efficiency and recycling that if one wanted to put a standard bulb into a light fitting the cost would make you think twice.

Am I the only student who has initially found this quite a difficult exercise, I took the light readings in various corners of the room, I chose the kitchen originally to compose my first set of images, as it is a very dark room anyway I was not happy with my trial results, so I went back to the very basics and started from scratch with the white balance on my camera set to manual and looking closely at the Kelvin colour temperature charts as seen below.

Visible colours are relative to the colour balance (white balance), with the common fixed settings being 3200K Indoor colour balance and 5500 Outdoor (daylight) colour balance.
Based on information from the book, Digital Lighting & Rendering.
Chart and colours (c)2003 Jeremy Birn.
Lighting and Rendering charts and colours

After sitting patiently and taking a series of images using the manual white balance setting and working through each of the above listed Kelvin ranges, I felt much happier with the knowledge I had gained. 

We were asked for this exercise to take 3 images when then light inside and outside is equal and balanced in light, using three WB. settings, Auto, Daylight and Tungsten.

This room is lit by a very large chandelier, just above where I positioned myself to take these images, in total 18 tungsten light bulbs lit the room from above.

I was able to set my camera to manual mode, ISO 100 throughout and F/8.0.


Fig 1.
Auto white balance
Fairly true to scene, and similar to that below, not quite so intense in colouration.
 
 
Fig 2.
Daylight white balance
Very warm glow to this image, I am surprised at how much warmth is seen, and results from using the Daylight WB. setting. The exterior view has a much less warmth to it.
 
 
Fig 3.
Tungsten white balance.
Blue colouration is seen here, the camera sensor has applied the blue tone to the scene outside the barn and a warmer yellow glow to the barn overall, due to the Tungsten WB.


I have much more knowledge of how lighting in any form and adjusting white balance can alter an image since working through those Kelvin charts.   It can be used creatively in Assignment 4.  I am sure I will benefit from this piece of learning and put it to good use in the future. 

Monday

Part 4. Light. Higher and lower sensitivity


ISO is the measurement of sensitivity to light, whether film or digital sensor. A low ISO is very insensitive and requires a lot of light. We can use a low ISO when we want the best possible image, usually with our camera mounted on a tripod. A high ISO (400, 800, 1600) is more sensitive and requires less light. We use a high ISO when photographing sports/action and need a higher shutter speed or when doing low-light, non-flash photography. A high ISO will cause more apparent grain and more digital noise with most digital cameras.
A standard ISO that one can use daily is ISO 100  it gives a clean and noise free image. 
 
For this exercise I used a tripod throughout, a light box, natural light from a side window.
D7000 with 60mm lens
Manual setting 
Auto white balance
 
I chose the cold cast figurine because it is a relatively smooth surface with areas where there should be shade and light areas.  The features on the face are very minimal and simple and there is little detail.  To look at it closely when holding it, there is a slight sheen and dark grey flat colouring.
 
 
Fig 1.
Base image - ISO 100.
Fine detail, little or no noise.
 
Fig 2.
ISO 200.
1/8th sec.  f/11.0
 Clean image
 
Fig 3.
ISO 400.
1/15th sec.  f/11.0
 More highlights and shade on this image, The hair is more defined, and folds of tunic can be seen more clearly.
 
Fig 4.
 ISO 640
1/15th sec.  f/11.0
Relatively low noise in this picture when enlarged.
 
Fig 5.
ISO 1000.
1/20th sec.  f/11.0
More visible grain when enlarged. Also more detail throughout the image.  the facial details are clearer, there seems to be colour appearing over the figurine.
 
Fig 6.
ISO 2000. 
1/45 sec.   f/11.0
Increasing the ISO is beginning to create some interesting effects.
 
Fig 7.
 ISO 4000
1/45 sec.  f/11.0
A noisy image which creates a gritty quality.
 
Fig 7a.
Enlarged area of image 7.  Cropped to show that the higher ISO has lightened the image and made visible the colours in the metal which is not usually seen by the naked eye. Random speckles of blue, yellow and red are visible.  Usually the image is inferior with this much noise, but I think the noise along with the use of printing on canvas would create a desirable acceptable print.
 
Fig 8.
ISO 6400.
1/180 sec.  f/11.0 
Again an image with much noise and on enlarging this image, the effect of such a high ISO has created another image with colour visible. 
 
Fig 8a. Enlarged image of fig 8.
 
The occurrence of colour specks where there should be non. 
The use of a higher ISO can be used when an image is required that does necessarily need to be clean and smooth.
 
 
I am surprised by my results as seen above, it is very clear to me that I have not understood the advantages of using various ISO Levels in differing situations. My images were taken in a well lit situation and I am now aware how advantageous it would be to use a higher ISO in a sport situation or badly lit scene.  I did not on this occasion shoot handheld.  I wanted to see the effect of high ISO, if these had been handheld, there would definitely be blur, caused by movement.
The colour specks really surprised me, as I cannot see them with a naked eye.  That may be my poor eyesight though... 


Tuesday

Weather and interesting light

After spending two days battling with poor internet connection and the inability to get WI-FI working, we at last have some success.. Having been away from the house for 5 and half years, what was in the house was ancient and not compatible with todays modern technology.  Yesterday after relying on my other half to deal with Orange France we came home from Tarbes with new livebox.......yes it was wonderful!!!!! for less than an hour then ...nothing, we could smell burning, powerpack to livebox had blown sockets and livebox rendered useless. Today following  another trip to Orange France and replacement powerpack in situ.  I finally have WI-FI.

But my hopes were dashed... we had an electric storm as I was working on this, my computer and electricity went down for just a second, resulting in total internet loss for two days.  The storm managed to obliterate all Orange online facility from Tarbes through to our village - Lascazeres and beyond....nothing to be done except sit it out.  Oh the joys of living at the foothills of the Pyrenees,

Following the addition of previous exercise, Light throughout the day to my learning blog, we have been blessed with wonderful weather. During the day in the low 40's followed on Friday by a very welcome storm.  I was determined to rise before sunrise to capture some of the wonderful light and colours.  My research told me that sunrise would be 6.31am. I was in the field at the rear of the house at 5.am and the results are seen below. 
 
 
Fig 1.    05.45am
1/30 sec.    f/8.0   ISO 200
White balance - Shade


Fig 2.   05.47am      
 1/30 sec     f/8.0   ISO 200
Auto white balance

Fig 3.
1/20 sec.  f/8.0    ISO 200
Auto white balance 
 
The resulting images show the wonderful colours and light here in the early hours and before sunrise.  I like the contrast with the 'silhouette' and outline of the trees and the rooftop of neighbouring house.   The Orange light warms the scene and the darker cloud formations adds contrast.  The particles in the early morning air glow orange and red due to Mie scattering. We only see these colours at sunrise and sunset.
Sunrise light is cooler(colour temperature wise) because there are less particles in the air. 


Saturday

Light throughout the day.

I have found this exercise to be quite time consuming, for several reasons.   For me at this time, it is very difficult due to relocating from the Middle East to our home in France. I left Oman at the end of May and have been in transit ever since, only arriving in France last Sunday.  During my travels I have spent time in UK, visiting Ceredigion, Wales, and other parts of England.  Travelling and living out of a suitcase for a month is not contusive to completing photography exercises on time or to the standard one wishes.

For this exercise, a full undisturbed day was required!!!! and a location was to be used, that showed the change in light throughout the day and one that I could return to hourly for a minimum of 12 visits. Whilst in Wales, I decided that to achieve this hubby, newly retired and under my feet needed to be sent off for the day....otherwise work would not be completed.  There was no internet access during this trip to Wales, therefor adding my images to my blog as a record of completion was impossible. 
Today I am France, with poor internet connection, slowest WI-FI ever and trying to add my resulting images to my learning blog, a very slow process this is going to be...again hubby has been sent off to the decheterie to dispose of empty cardboard packing cases from Oman.

The location I have chosen was off the beaten track, quite close to Tregaron...to reach my chosen shooting position, there was a short walk from where I was staying and to reach it a trek across two small fields.  The lake was man made and within the land of the cottage where I  was staying...very beautiful it was too !!
The weather had not been good, but on getting up one morning, slightly later than sunrise, I decided to use the 'fine dry' weather forecast, excellent light and good forecast for the day to my advantage.
I had walked around the lake earlier in the week, on a less sunny day and found that this view of my chosen landscape would be an excellent vantage point for my composition giving me the opportunity to capture shadow, reflections and varying light, enabling me to be able to shoot without shooting directly into the sun. 
The sun had already risen, and was behind me in the first image, travelled round and set in front of the camera. It was early summer. 
The foreground is a water plant, the middle ground of the images would give interesting reflections and the trees would throw shadows and the varying light will strike the trees.
Throughout this exercise I used:

Nikon D7000
18-105 lens
ISO 100
White Balance sunny.
Manual mode
Tripod

Below are the results.

Fig 1.
   
 8.15 am.
Fig 1. was my starting point, the sun behind me and slightly to the left.  The shaded area to the foreground and below the central diagonal line of trees reflects the blue colour from the sky. 
The sky being the light source is also reflected on the water.  
 
Fig 2. 
9.33am.
Shadows are cast below the trees. Reflections on the waters surface are slightly diffused.
 
 Fig 3.
10.29 am.
The clouds which appear have scattered the light with shorter wavelengths.  The light coming from the cloud is colder and bluer.
 
Fig 4.
11.36 am 
 
Fig 5.
12.35pm
At noon light is harsh on a clear day.  In this image the cloudy layer has acted as a large diffuser and the light is non directional.
 
Fig 6.
13.47pm
 
Fig 7.
14.40 pm
From the downward sunlight, a more neutral coloured light. The water appears more transparent. Shadows are cast below the trees, less harsh light.  
 
Fig 8
15.59 pm
 Cooler soft appearance, no direct sunlight.
 
Fig 9 
17.07 pm 
High contrasts in light, slightly warm with pink tinges around tree line.
 
Fig 10
18.03 pm
Less harsh light, light is warmer 
 
Fig 11
19.33 pm
Light quality is improving prior to sunset.  Slightly warm tones.
 
Fig 12.
20.41 pm
The most desirable time for photography.  Warm glows from a setting sun.  The warm colours are due to the absorption and scattering process in the atmosphere.
 
 
Due to typical British weather in early summer, some of my images have cloud cover, but  these do show the difference in light from that when the sun is shining.   I did not manage to capture a spectacular sunrise or sunset and this exercise has made me more determined to try out some photography at these special times....
I can see throughout the images above that the ones taken in clear sunny weather are more defined than those taken when there was cloud cover. 
I have two preferred images, fig 7. with the bright blue sky and contrasting greens and the reflection of the tree in the lake and the final image I have submitted where the low warm light catches the top of the tree , the lake and also gives a warmer glow to the field of yellow, even around its perimeter.